Overview
CloudFront is an Amazon Web Services (AWS) Content Delivery Network (CDN) service that serves static and dynamic content at lightning speeds to users all around the world.
Pro tip: If you see those emboldened words in your AWS certification exam, look out for CloudFront among your mutiple choice answers.
CloudFront is a finely-tuned propagation mechanism that leverages Amazon's globally-distributed data centers to cache as well as deliver data, videos, applications and APIs using edge locations closest to users.
If the edge location does not already contain the requested content, CloudFront would fetch the data from an origin and cache it at the edge location en route to delivering it to the user. Among the AWS services that can be configured as a CloudFront origin are Amazon S3 buckets, Amazon EC2 instances, Amazon Elastic Load Balancer, etc.
This tutorial will guide you on how to create your content using a simple "Hello World" HTML file and store it in an Amazon S3 bucket. We will configure the S3 bucket to act the CloudFront origin.
Finally, we will test whether the content is being properly distributed by using the CloudFront domain name in a web browser.
Prerequisites
This tutorial assumes that you are familiar with the AWS Console and have the necessary IAM permissions set up.
If you are not signed up with an AWS account, first click on Activate Your AWS Account and then Create Your First IAM Admin User to follow detailed instructions on how to get started.
Step-by-step guide
Create content and store in S3
Let's begin by creating a simple HTML file to serve as a static webpage. Using any text editor on your local machine (eg: Notepad on Windows, TextEdit on Mac), copy and paste the HTML code below and save the file as index.html.
<!DOCTYPE html>
<html>
    <head>  <title>Basic Web Page</title>
    </head>  <body> Hello World!
    </body>
</html>
Click here to open the AWS console and use the search bar to find the S3 dashboard, where we will create an S3 bucket to store the HTML file that we just created.
Once you are signed into the Amazon S3 console, click the Create bucket button.
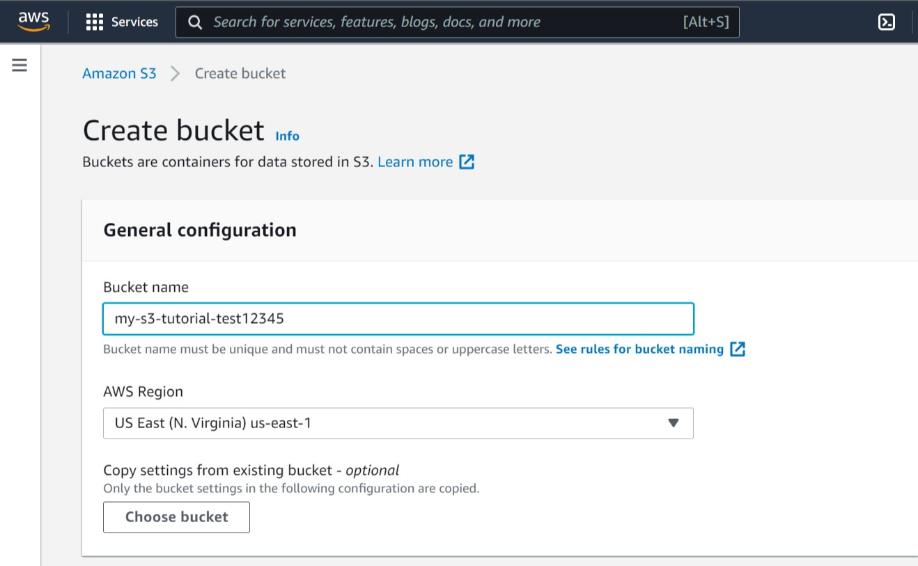
Under Bucket name, enter a unique name (eg: my-s3-tutorial-[EnterUserName).
For Region, choose a region that is closest to you. You are free to pick any region but opting for a region closest to you would optimize latency and avoid extra costs.
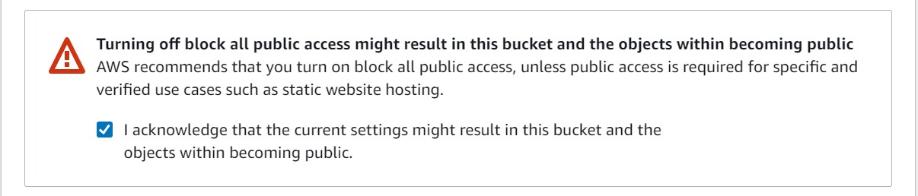
Next, we need to modify the default settings of your S3 bucket from private to public to make the content publicly accessible.
Scroll down to Block Public Access setting for this bucket and untick Block all public access. You will be prompted with a warning message. Tick the box to acknowledge.
When you scroll down you will see other useful features for your S3 bucket such as Object Ownership, Bucket Versioning, Tags, Default Encryption and Advanced Settings.
However, since this is a beginner's guide on CloudFront, we will not be tweaking any of these settings.
Select Create bucket.
After creating the bucket you will return to the S3 dashboard. Look for the bucket you just created under Buckets. Click on the name of the bucket.
Select Upload then Add files. Select the HTML file that we created earlier.
When you scroll down you will see other useful S3 functions such as Destination, Permissions and Properties. Leave those settings as default.
Click Upload.
Create a CloudFront distribution
Now that your S3 bucket contains content, we can configure Amazon CloudFront to deliver that HTML file as a static webpage to users all around the world.
Click here to open the management console in a new browser tab. Find and select Amazon Cloudfront in the search bar.
Click on Create distribution.
Under Origin > Origin domain, click on the Choose origin domain search bar and select your S3 bucket.
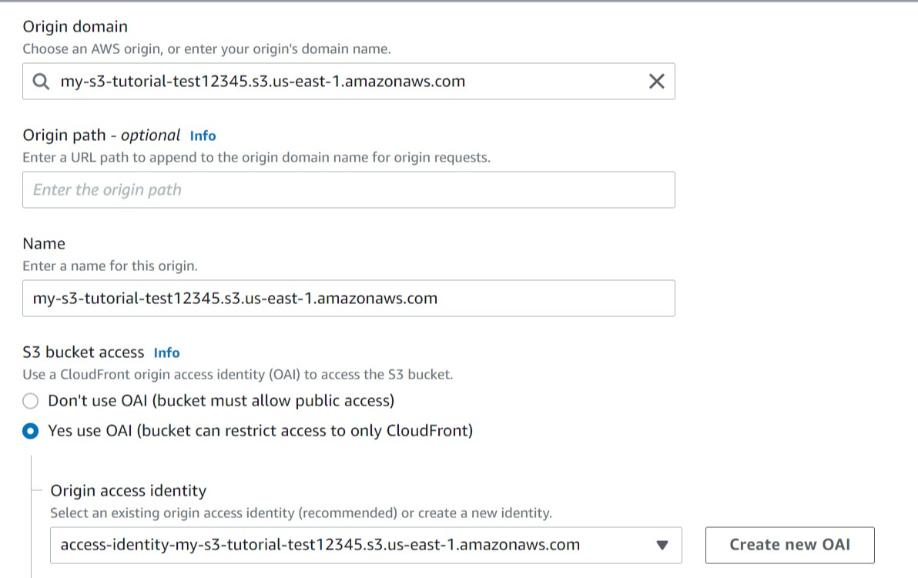
A default Name will be chosen for your origin (eg: my-s3-tutorial-test12345.s3.us-east-1.amazonaws.com). Leave it as default for this tutorial.
As best practice, it is recommended to channel public access to the S3 bucket via CloudFront by using origin access identity (OAI).
Under S3 bucket access, select Yes use OAI (bucket can restrict access to only CloudFront.
Select Create new OAI to generate an OAI.
Under Bucket policy select Yes, update the bucket policy. This will automatically update the selected S3 bucket policy to allow traffic only through CloudFront.
There are some really useful CloudFront features as you scroll down such as Default cache behavior, Cache key and origin requests, Function associations and Settings. Each of these functions plays a significant role in how CloudFront handles distribution.
We are going to leave all the other settings as default for this tutorial.
Select Create distribution.
Load the webpage
CloudFront takes a few minutes to deploy all the configurations. Once it is completed, you will see its status change from Deploying to Deployed.
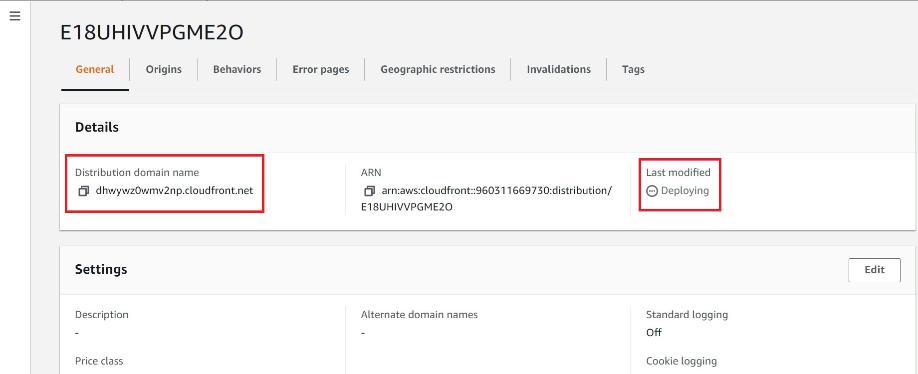
We have created an endpoint using S3 and we have configured CloudFront as the CDN to deliver the content. Now it is time to test whether it works by copying and pasting CloudFront's distributed domain name and appending it with /index.html (eg: https://dhwywz0wmv2np.cloudfront.net/index.html) in your favored web browser.
Press Enter.
Your web browser should return Hello World! like the image below.

Clean up the console
If you do not need the resources you created, it is best practice to delete them to avoid incurring unnecessary charges to your account. First, disable CloudFront, then empty your S3 bucket before deleting it.